
Gitea Setup on Debian/Ubuntu (LAN Access, PostgreSQL, Apache)
1. System Preparation
Update system and install necessary packages:
sudo apt update && sudo apt upgrade -y
sudo apt install git wget curl -y
No SQLite needed, since we’ll use PostgreSQL.
2. Create PostgreSQL Database for Gitea
Switch to PostgreSQL user:
sudo -u postgres psqlInside PostgreSQL shell:
CREATE DATABASE gitea;
CREATE USER gitea WITH PASSWORD 'your_strong_password';
ALTER DATABASE gitea OWNER TO gitea;
GRANT ALL PRIVILEGES ON DATABASE gitea TO gitea;
\q
Notes for PostgreSQL:
- Replace
your_strong_passwordwith a strong password of your choice.- The PostgreSQL user
giteawill be used by the Gitea web application to connect to the database.- The PostgreSQL database
giteawill store all Gitea data: repositories, issues, users, etc.- The PostgreSQL database owner is set to
giteato allow proper privileges.- The Linux user
gitwill run the Gitea service. Its home directory is /home/git.- Web users access Gitea through the web interface; they do not use the
gitLinux user or PostgreSQL credentials directly.
3. Create Git User for Gitea
sudo adduser --system --shell /bin/bash --group --disabled-password --home /home/git gitNotes for Linux:
- The Linux user
gitis used by the Gitea service to access the Gitea directories and files.- The home directory
/home/gitis used by the Gitea service to store Gitea data.- The
gitLinux user does not access the PostgreSQL database.- The
gitLinux user does not interact with Apache; Apache reverse-proxies traffic to Gitea internally.
4. Create Gitea Directories
sudo mkdir -p /var/lib/gitea/{custom,data,log}
sudo mkdir /etc/gitea
sudo chown -R git:git /var/lib/gitea/
sudo chown root:git /etc/gitea
sudo chmod 770 /etc/gitea
Notes for Linux:
- The
/var/lib/giteadirectory is used by the Gitea service to store Gitea data: repositories, logs, uploads.- The
/etc/giteadirectory is used by the Gitea service to store configuration files./etc/giteastores configuration files like app.ini.- The
gitLinux user owns the/var/lib/giteadirectory and has full read/write access.- The
rootLinux user owns the/etc/giteadirectory and has read/write access for thegitgroup.- The
/home/gitdirectory is used by the Gitea service to store Gitea data.- Permissions are set to
770on/etc/giteato allow access for owner and group only.- Recursive ownership (
-R) ensures all subdirectories and files under/var/lib/giteaare owned bygit.
| Directory | Owner | Group | Permissions | Purpose |
|---|---|---|---|---|
| /var/lib/gitea | git | git | recursive, full access | Store repositories, logs, and Gitea data |
| /var/lib/gitea/… | git | git | recursive | Subdirectories inherit same permissions |
| /etc/gitea | root | git | 770 | Store configuration files; root controls, git group can access |
| /home/git | git | git | default | Home directory for Gitea service user |
5. Download Gitea Binary
wget -O gitea https://dl.gitea.com/gitea/latest/gitea-linux-amd64
chmod +x gitea
sudo mv gitea /usr/local/bin/
gitea --version
Notes for Linux:
wgetdownloads the latest Gitea Linux AMD64 binary from the official source.- The
-O giteaoption saves the downloaded file with the name gitea.chmod +x giteamakes the binary executable so Linux can run it.mv gitea /usr/local/bin/moves the binary into the system PATH so it can be executed from anywhere.gitea --versionverifies that the installation was successful.- The
/usr/local/bindirectory is typically used for manually installed system-wide binaries. This step installs the Gitea application but does not start it as a service yet. The Gitea service will later run under thegitLinux user.
Ownership and Permissions Table
| Command | Purpose | Why It’s Needed |
|---|---|---|
| wget | Download Gitea binary | Retrieves the application from official site |
| chmod +x | Add execute permission | Allows Linux to run the binary |
| mv to /usr/local/bin | Move binary to system PATH | Run gitea from anywhere |
| gitea —version | Verify installation | Confirms successful installation |
6. Configure Gitea as a Systemd Service
Create /etc/systemd/system/gitea.service:
[Unit]
Description=Gitea
After=network.target postgresql.service

[Service]
RestartSec=2s
Type=simple
User=git
Group=git
WorkingDirectory=/var/lib/gitea/
ExecStart=/usr/local/bin/gitea web --config /etc/gitea/app.ini
Restart=always
Environment=USER=git HOME=/home/git GITEA_WORK_DIR=/var/lib/gitea

[Install]
WantedBy=multi-user.target
Enable and start the service:
sudo systemctl daemon-reload
sudo systemctl enable gitea
sudo systemctl start gitea
sudo systemctl status gitea
- Notes for Systemd:
- The service file tells Linux how to run Gitea as a background service.
After=network.target postgresql.serviceensures Gitea starts only after networking and PostgreSQL are available.User=gitandGroup=gitensure Gitea runs with limited privileges for security.WorkingDirectory=/var/lib/gitea/sets the runtime working directory.ExecStartdefines the command used to start Gitea.--config /etc/gitea/app.initells Gitea where to find its configuration file.Restart=alwaysensures Gitea automatically restarts if it crashes.- Environment variables define runtime paths and user context.
systemctl daemon-reloadreloads systemd to recognize the new service.systemctl enable giteastarts Gitea automatically at system boot.systemctl start giteastarts the service immediately.systemctl status giteaverifies whether the service is running.
Service Configuration Breakdown
| Section | Directive | Purpose |
|---|---|---|
| [Unit] | Description | Service description |
| After | Start order dependency | |
| [Service] | User / Group | Runs service as git user |
| WorkingDirectory | Runtime directory | |
| ExecStart | Start command | |
| Restart | Auto-restart if failure | |
| Environment | Sets required runtime variables | |
| [Install] | WantedBy=multi-user.target | Enables service in normal system mode |
7. Configure Gitea (app.ini) for LAN
Edit /etc/gitea/app.ini:
[server]
HTTP_ADDR = 127.0.0.1
HTTP_PORT = 8000
PROTOCOL  = http
DOMAIN    = 123.45.67.89
ROOT_URL  = http://123.45.67.89:8080/
Restart Gitea:
sudo systemctl restart gitea
- Notes for LAN Configuration:
- HTTP_ADDR = 127.0.0.1 makes Gitea listen only on localhost for security.
- This prevents direct access to port 8000 from other machines.
- Apache will reverse-proxy requests to Gitea internally.
- HTTP_PORT = 8000 sets the internal port Gitea runs on.
- Port 3000 is not used because it is already occupied.
- PROTOCOL = http defines the internal protocol (Apache handles external access).
- DOMAIN should be your server’s LAN IP address.
- ROOT_URL must match the external URL users use to access Gitea.
- If ROOT_URL is wrong, clone URLs and redirects will break.
- Restarting the service applies the new configuration.
Configuration Breakdown
| Setting | Value | Purpose |
|---|---|---|
| HTTP_ADDR | 127.0.0.1 | Restricts direct external access |
| HTTP_PORT | 8000 | Internal Gitea port |
| PROTOCOL | http | Communication protocol |
| DOMAIN | Server LAN IP | Used for generating links |
| ROOT_URL | http://IP:8080/ | Public URL accessed via Apache |
Why USE 127.0.0.1?
- Because:
- Gitea should not be directly exposed on port 8000.
- Apache handles public access.
- This adds an extra layer of security.
After this step:
- Gitea runs internally on
127.0.0.1:8000- Apache will proxy traffic from
http://123.45.67.89:8080- Users on your LAN access Gitea through Apache, not directly
8. Configure Apache Reverse Proxy
Enable required modules:
sudo a2enmod proxy proxy_http headers
sudo systemctl restart apache2
Create Apache vhost file /etc/apache2/sites-available/gitea.conf:
<VirtualHost *:8080>
    ServerAdmin admin@your-server
    ServerName 172.16.111.237

    # Reverse proxy to Gitea
    ProxyPreserveHost On
    ProxyRequests Off
    ProxyPass / http://127.0.0.1:8000/
    ProxyPassReverse / http://127.0.0.1:8000/

    # Forward protocol headers
    RequestHeader set X-Forwarded-Proto "http"

    # Logs
    ErrorLog ${APACHE_LOG_DIR}/gitea_error.log
    CustomLog ${APACHE_LOG_DIR}/gitea_access.log combined
</VirtualHost>
Tell Apache to listen on 8080:
# Edit /etc/apache2/ports.conf
Listen 8080
Enable the site:
sudo a2ensite gitea
sudo systemctl reload apache2
- Notes for Apache Reverse Proxy:
a2enmod proxy proxy_http headersenables required Apache modules for reverse proxy.- Apache listens on port
8080and forwards traffic internally to Gitea on 127.0.0.1:8000.ProxyPreserveHost Onensures Gitea receives the original host header.ProxyRequests Offdisables forward proxy mode (security best practice).ProxyPassforwards incoming traffic to Gitea.ProxyPassReverserewrites redirects correctly.RequestHeader set X-Forwarded-Protoensures correct URL generation.- Apache handles external access; Gitea remains internal only.
- Logs are stored separately for debugging (
gitea_error.log,gitea_access.log).
Reverse Proxy Flow
| Component | Port | Role |
|---|---|---|
| Client Machine | 8080 | Accesses Gitea via browser |
| Apache | 8080 | Public-facing web server |
| Gitea | 8000 | Internal application server |
| PostgreSQL | 5432 | Database server |
How It Works
-
You Open:
http://123.45.67.89:8080 -
Apache receives request:
-
Apache forwards it to:
http://127.0.0.1:8000-
Gitea processes it.
-
Apache returns the response to your machine.
9. Configure Firewall (If you use UFW)
sudo ufw allow 8080
sudo ufw reload
Port 8000 does not need to be open externally, since Apache forwards traffic internally.
10. Access Gitea from Your PC (LAN)
- Open browser:
http://123.45.67.89:8080-
Complete the Gitea web setup:
- Database → PostgreSQL
- Host →
127.0.0.1:5432 - User →
gitea - Password → your DB password
- Database →
gitea - SSL → Disable (local connection)
-
Create admin account and finish setup.
11. Optional: HTTPS (Future / Domain)
sudo apt install certbot python3-certbot-apache
sudo certbot --apache -d git.yourdomain.com
Update ROOT_URL in /etc/gitea/app.ini:
ROOT_URL = https://git.yourdomain.com/Restart Gitea and Apache.
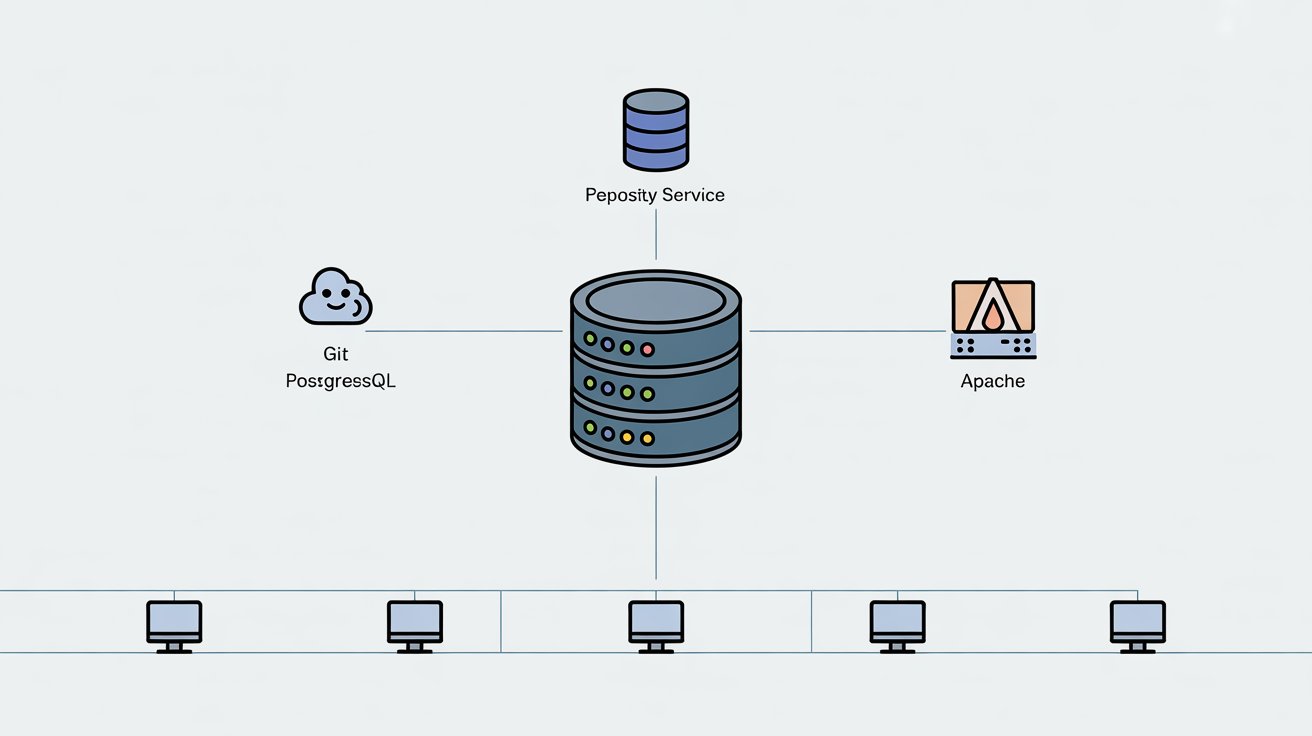
Architecture Overview
PC/Laptop (LAN)
      |
      v
Apache (123.45.67.89:8080)  <-- external port
      |
      v
Gitea (127.0.0.1:8000)        <-- internal port
      |
      v
PostgreSQL (127.0.0.1:5432)- Port 8000 → internal Gitea port (not exposed)
- Port 8080 → external Apache port for LAN access
- PostgreSQL → internal only
Notes
- Do not use SQLite — using PostgreSQL.
- Keep Gitea bound to
127.0.0.1for security. - Apache handles all external traffic and can serve multiple apps on different ports.
- External port (8080) can be changed as desired.